Monday, August 31, 2009
Sweet Pink Blanket

I had leftover Neapolitan yarn from the last crocheted blanket that I made, so I edged this pretty pink fleece with it. I wove a pink polka-dot ribbon through the edging for what I think is a sweet look.


Sunday, August 30, 2009
Double Dip Blankie


Thanks to another night of insomnia, I finished this Neopolitan blanket.

This is one that people will either love or hate. It's different. I'm sort of proud of it. The center medallion is done using a larger version of the short-row tunisian dish-cloth pattern. I then expanded the blanket using blhdc and edged it with a simple looped edging.

I like that the shape isn't exactly round but more like a flower. I'm not sure how practical round baby blankets are, but this can be a swaddling blanket for an infant or a car seat cover for an older baby.

I'll be giving this one to Marine Corps Kids.


Sweet Dream Weaver


Now that I've tried my hand at weaving, I'm a bit obsessed with it. As soon as I got home from the class yesterday I started another project, and I didn't go to sleep until I finished it.

This is far from perfect. There are several mistakes, but overall I'm pleased with the result. I realized few things about technique, too, so this project was a great learning project.

This is a receiving blanket. The warp (vertical yarn) is Patons Grace in lavender, and the weft (horizontal yarn) is Knit Picks Crayon in Azure and Purple. The fabric is very light weight and has a nice drape to it.

This blanket will be donated to Marine Corps Kids.

Now....if I could just get a good night sleep I wouldn't be blogging at silly hours in the morning! I think I need my own sweet dream weaver!


Saturday, August 29, 2009
Weaving Class

Today I took a weaving workshop using a rigid heddle loom. I'm hooked! It was so relaxing and so fun! I'll never give up crochet, but I'm going to buy a loom and start weaving too!!!

This is the scarf I made. The colors don't show well in the photo. The background is a pretty coral colored cotton/wool blend. The stripes are a hand-dyed cotton boucle in coral, pink and purple.


Tuesday, August 25, 2009
WIP


I usually am a one-project crafter. Right now I have 3 big projects in work.

I'm still working on my green linked-stitch baby blanket. I think it's going to be lovely, but it's going to take time and patience so I'm working on other things in between.


Over the weekend I started two different baby blankets using this sweet Neapolitan baby yarn. I didn't like the yarn in either pattern and frogged them both. Then I decided that it would look great if I used it with the Tunisian pattern that I learned this weekend. I enlarged the circle and will continue with a very thick edging to make a small baby cover. I like the flower shape of this blanket, and I hope it turns out well. It is slightly off center, but the way it joined, I don't think it's horrible.

I also have an "itch" to weave more while I still have Kandy's loom.

I came home tonight and started this scarf project. I had some trouble when I started. Two of my strings broke, so I had to make the scarf thinner. I'm using a delicate wool and a ribbon yarn. It's a very odd combination - I figured if I was going to risk something really ugly, I should do it now while I'm a beginner.

I actually love the way it looks!!! It doesn't feel fabulous - it's not particularly soft, but the colors are gorgeous!! I'm afraid this one might never get finished - I don't know if more of my strings will tear before I'm done, but I'm hoping I can get a full length scarf from this because it's too pretty to throw away.


Sunday, August 23, 2009
One Tiny Scarf for TheWorm, One Giant Leap for Wormcraft!
As I already posted that I'll be taking a weaving class next week. I'm really excited about it!!!!

My friend Kandy was kind enough to loan me her loom to use for the class and to practice with. Kandy is the most talented crafter I have ever met. She knits, crochets and sews beautifully! She spins and weaves. She's also an amazing cook. And to top it all off, she raises rabbits!!! How can you not love someone who crafts, cooks and raises rabbits?

So, I brought this loom home on Friday with absolutely no idea how to use it. It took me a while to figure out which side was the front and which side was the back. I was also challenged in figuring out where the......thingamabob sits (I'm sure that's not the formal name for the thing that holds the yarn strands separate.

Anyway, I managed to YouTube my way through a first tiny project!!! And it was fun!!!

I had some probl....I mean challenges warping the loom (that is the correct term for stringing the loom!). Then I'm sure that I had the thingamabob in the wrong "down" position (if you weave you know what I mean - if you don't - I did something incorrectly) which made the entire project a bit harder than it should have been. A few inches into the scarf, I realized where I think the thingamabob should go, but I didn't know how to correct my mistake without cutting all the yarn from the loom and starting over. I would like to think that this mistake is why one of my edges is more sloppy than the next, but I think that the real culprit is my inexperience.

Anyway, I did make a teenie-tiny little scarflet. It would be perfect for a young child, but I don't think I could bear to part with it! It's my first!!!

I can't wait to take this class and learn how to weave properly!

Kandy, if you're reading this, thank you sooooo much for letting me use your loom! I'm going to be addicted to weaving soon!


Saturday, August 22, 2009
Take Two

Sleep still alludes me, but I think I figured out the Tunisian pattern.


Hooking All Night

Hooking all night, there was nothing else for me to do..... Allow me this Springstein moment - I'm a Joisey Girl.

So, last night I had insomnia. Dog tired, but I can't sleep and I can't get comfortable insomnia. Laying in bed for hours wasn't going to accomplish anything so I went upstairs and started to crochet. I did about 6 inches of sc on a baby blanket, decided I didn't like the yarn I was using for that pattern, and put that down.

Yesterday, Hubby had mentioned that we could use new hot pads so I started to make Crafty-boy's Tunisian Short Row Dishcloth. I printed this pattern out some time ago, and never got around to trying it. At 4 am I decided it was time. My first attempt didn't work. I pulled loops up through the bars instead of around the bars, and that made the cloth too big.

This morning I tried it again and this time it worked! The picture shows the cloth I made.

When I googled for the pattern to post the link, I found a video tutorial on how to make this cloth. Low and behold - I worked the stitches incorrectly!!! I worked my stitches around each post instead of around just the front loop of the posts. I'll be trying this pattern again the "right" way soon.

In the meantime, I'm happy with this cloth. The finished project looks complicated to create, but the pattern is really surprisingly simple. It was a great learning project for me to get more comfortable with Tunisian Crochet.

I really like the look of this cloth and can think of several ways to adapt it to more projects.


Wednesday, August 19, 2009
Linked-Stitch Edgerydoo Pattern


In a recent post I showed a blanket set that I made using a linked-stitch edging. The blanket was pretty, but it wasn't quite perfect. The edges didn't lay flat, and that bothered me. I tried again using a larger hook and working more extra stitches in the corners to help the blanket lay flat. This one worked well, and is very pretty (if I may say so myself).

Here's the pattern:

Linked-Stitch Edgerydoo Pattern

This edging was designed using the EdgeryDoo 001 template.

Cut and prepare your fleece following the instructions on the Edgerydoo website.
You'll also want to learn to do linked triple crochet (see this video for instructions)

To crochet the edging you'll need:
worsted weight yarn - I used Caron Simply Soft D hook (3.0 mm) J hook (6.0 mm) 8 stitch markers

Row 1: using D hook and with right side of fabric facing you, SC-chain 2 through each pierced hole in your fabric. Join w/ slip stitch to first sc.

Locate the center of each curved "corner" on your fabric. Count 7 stitches to either side of the center, and mark with stitch markers (you'll be marking the center 14 stitches at each corner)

Row 2: Switch to J-hook. This row is worked in the chain-2 spaces created in Row 1. *linked triple in first ch-2 space, 2-linked triples in next ch-2 space*. Continue this pattern around edged until you reach the first stitch marker. In the 4 corners you will do 2-linked triple stitches in each chain-2 space. Then continue with * the basic pattern all the way around. At end of round, join w/ slip stitch.

Row 4: Chain 1, sc in back loop only all the way around the edge. Join w/ single crochet. End off.


(Many thanks to my friends Marlene and Byron from Edgerydoo. Marlene does an amazing amount of charitable work for Project Linus. She inspires me to do more and helped me check and edit this pattern)


Tuesday, August 18, 2009
Dream Weaver


For a long time now, I've been dreaming of weaving. I've done a few crochet/weave projects and just love them! For years now, I've been dreaming of buying a loom.

The big looms require a room of their own and and investment of hundreds (if not over a thousand) dollars!

Rigid Heddle looms are small, portable, and can be purchased for $100-$200. If this is something that I love, that's an investment I can contemplate.

So - on the 28th, I'm taking a Rigid Heddle Loom Workshop at one of our local yarn stores.

I'm so excited!!!


Sunday, August 16, 2009
Linked Stitch Baby Set
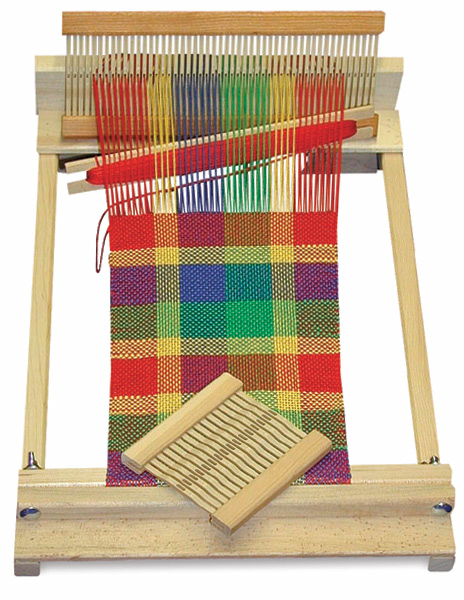
I love the look of the linked triple stitch, so I decided to try and use it as an edging for a fleece blanket.

I pierced a piece of pink fleece and used TLC Baby for the edging. The "pattern" is very simple. I did sc in each hole in the fabric, and then 2 chains between. For the next row I did linked triple crochet around. Then I did a row of reverse-single-crochet to finish the piece off.

Linked triples take a bit more time than traditional crochet, but the look is lovely. This blanket isn't perfect. It's important to double up the stitches around the corners so that they don't bunch or ripple. I got one of the 4 corners right. The rest are ok, but could be a bit looser.

I then made a matching headband and hat. The headband was made with sock yarn and my Easiest Ever Headband pattern. The flower is a two-layered six-petal simple flower.

The hat is a simple cap that I edged with 1 row of linked triple crochet.

This set will be sent to Marine Corps Kids.


Tuesday, August 11, 2009
My headache hat
I suffer from almost chronic headaches. Sometimes they are horrific migraine-type monsters. Usually they are bad tension headaches that can last for hours on end without relief.

Sometimes neither over-the-counter nor prescription pain-killers give me relief. I hate having to take pills on a daily basis. I've found that ice is often the best treatment. While an ice pack doesn't always cure the headache, it usually offers enough relief to take the edge off and make it more bearable.

For several months the headaches were so severe that I would come home from work, get an ice pack and get into bed. I'd have to lie very still on my back so that the ice pack would stay in just the right location.

Finally it occurred to me that I needed a headache hat. Something to wear that would keep the ice pack in place and allow me to be more comfortable while getting some relief. Seems like a simple enough idea - and one that I should have had much sooner!!!

I used a stretchy cotton ribbon yarn and a variation of Sandyfroglegs' Hot Cross Buns Hat. The hat is made from a granny square and then worked in rounds. I modified it so that the sides are a more open weave. The design is perfect for holding an ice cap in place without being too hot or bulky. I think that Sandy's pattern is a really cute design!

Any cap design can be used as a "headache hat". Ice is an easy treatment with no side-effects. Well - it does have one side effect - it can make you cold! If you crochet or knit, though, you can make yourself a blanket to match!


Monday, August 10, 2009
Linked Stitches

Since I "gave up" on knitting, I've been having fun exploring new stitches and methods of crochet. Over the weekend I "discovered" linked stitches. I absolutely love this technique. It's fun to do, and I love the tight "fabric" that it creates. While the result looks more solid, its very light and drapes beautifully.

This project will eventually be a car seat cover for Marine Corps Kids.


Saturday, August 08, 2009
Free Pattern: Easiest-Ever Baby Headband

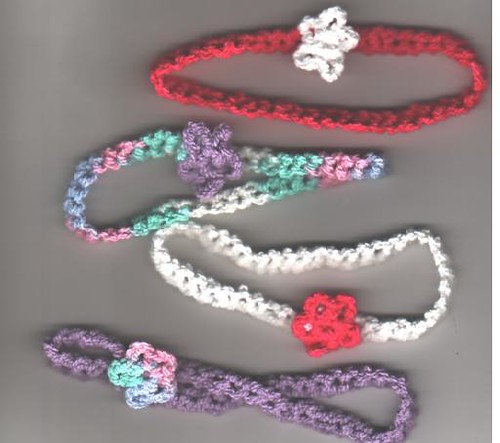
This week Kimela left a comment on my blog asking if I had a beginner pattern for a baby headband. I’ve seen some really cute headband patterns online, but the more I thought about it, the more I thought that I could make a fast and super-easy beginner pattern.


What I came up with is so simple that I hesitate to call it a "pattern"!


I had two “brilliant” ideas. One – by using a no-chain foundation stitch, I could make a stretchy headband without having to sew or weave in a piece of elastic. Two – for even more stretch, I could use stretchy sock yarn. A trip to the yarn store and a few minutes crocheting and I had headbands!


What you’ll need:

A small amount of stretchy sock yarn - I used Cascade Yarns “Fixation” which is a cotton elastic mix.

A “D” hooks (3mm)

A sewing needle and a small amount of thread in a coordinating color.


(Note - you can use regular baby yarn for this pattern, but it won't have nearly as much stretch. I strongly recommend buying elasticized sock yarn. The headbands that I made with sock yarn were very stretchy. Un-stretched they had a circumference of 12”. They stretched to 16” – 18”. I made the same pattern using TLC baby yarn. The baby yarn version only stretched from 12” to 14”.


If you’re not familiar with a no-chain foundation stitch, you’ll want to learn it as it is the foundation of this “pattern”.


A great video tutorial can be found here.


The “pattern”

Using the chain-less foundation stitch, crochet a row 12” long. (you can make the row longer or shorter to fit around baby’s head). Finish off at end of row – weave in both ends.


Making sure not to twist the row, sew the two edges together.


Sew a decorative motif over the sewn seam. You can use a store bought satin bow or crochet your own motif. I used simple flower motifs that I crocheted as follows:

Using D hook, chain 4. Slip stitch to first chain to create a loop.

Chain 5, sc in center loop. Repeat 4 more times to create a simple 5 petal flower. Finish off. Pull loose edges through back of flower. Sew over seam in headband.


For the boys


I am the first to admit that my first hairpin lace project did not result in a work of beauty. In my defense - it was my first attempt at a new technique, I used cheap yarn that I had on-hand to practice with, and while I love the technique I hate the Boye loom.

The photos in my last post were described as "interesting" - a term that in my own mind often means "ick". In any case, it was a good learning project. My new beautiful loom is here and I'm ready to try and make something pretty.

As for the first project.....I thought the boys might like it. Tater has a new love for an afghan that my MIL made for me many years ago. I'm always cold, so I sleep with this afghan. Tater thinks it's delicious - especially the blue fringe (the pink, white and yellow fringe apparently are not nearly as yummy".

So I finished off my sad little project and donated it to my boys for their clawing amusement.


footer2.JPG